Difference between revisions of "Hardware"
(→Bifferboard Twin-USB (reduced availability)) |
|||
| (49 intermediate revisions by the same user not shown) | |||
| Line 1: | Line 1: | ||
| − | + | __TOC__ | |
| − | + | == Weather Stations == | |
| − | + | ||
| − | + | Meteoplug supports exactly the same weather stations as Meteohub. As current Meteoplug clients just have USB, weather stations with USB connector (serial and HID type) or TCP/IP connection (connected via a hub, switch or router to Meteoplug client) are directly supported. To have a RS232 connected weather station supported a Meteoplug compatible RS232-to-USB converter is needed. Attached you find a list of supported weather stations. | |
| − | + | ||
| + | Internal data logger of weather stations is in general not supported. Exception is Davis Vantage/Vue. Here Meteoplug checks for data in the internal logger of the weather station before doing reading regular live data. | ||
| + | |||
| + | === Supported Weather Stations === | ||
{| style="background:none" border="1" cellpadding="5" cellspacing="0" | {| style="background:none" border="1" cellpadding="5" cellspacing="0" | ||
| − | |+ | + | |+ align="bottom"|''supported weather stations'' |
| − | |'' | + | !colspan="2"|Weather station |
| − | | | + | ! Description |
| − | + | ||
| − | + | ||
|- | |- | ||
| − | | | + | |<center>[[File:vantage.png]]</center> |
| − | | | + | |'''Davis''' Vantage Pro2, Pro1 (except firmware A) |
| − | | | + | |Vantage Pro including wind, rain, pressure, UV, solar radiation, indoor temperature, outdoor temperature and 7 extra temp/hum sensors are fully supported. Additional "Soil" and "Leaf" sensors as well as pure temperature sensors are also supported. Meteoplug can handle RS232, USB and TCP/IP (WeatherLinkIP) variants of Vantage. Data internally logged in Vantage is checked by Meteoplug when Meteoplug starts operation. If there is historical data not available to Meteoplug so far, this logged data will be transferrred to Meteoplug before logging of live data starts. RS232 Vantage must have set baud rate to 19.200. |
| − | + | ||
|- | |- | ||
| − | | | + | |<center>[[File:vue.png]]</center> |
| − | | | + | |'''Davis''' Vantage Vue |
| − | | | + | |Vantage Vue including all available sensors is fully supported. Meteoplug can handle RS232, USB and TCP/IP (WeatherLinkIP) variants of Vantage. Data internally logged in Vantage is handled by Meteoplug as explained for Vantage Pro. RS232 Vantage must have set baud rate to 19.200. |
| − | + | ||
|- | |- | ||
| − | + | |<center>[[File:envoy8x.png]]</center> | |
| − | + | |'''Davis''' Envoy8x | |
| − | + | |New Envoy8x receiving unit from Davis is supported. Connection to Meteoplug client is done via RS232 or USB data logger from Davis. Historical data stored in the receiving unit are not considered at the moment. Initial configuration of Envoy8x regarding connected weather stations has to be done upfront with the PC programs provided by Davis. Meteoplug client is not capable to do this. | |
| − | |< | + | |
|- | |- | ||
| − | | | + | |<center>[[File:wmr928.png]]</center> |
| − | | | + | |'''Oregon''' WMR928 (EU), WMR968 (US) |
| − | | | + | |This model has a RS232 connector that needs a RS232-to-USB converter (based on CP2101, FTDI or PL2303 chipset). Serial protocol of this weather station is well understood and widely documented. As a result Meteoplug does support all of it's features. Disadvantage of the station not to have a data logger included is compensated by Meteoplug. Station is limited in terms of sensor variety. It can handle a maximum of 3 additional thermo/hygro sensors and is lacking support of an UV sensor. |
| − | + | ||
|- | |- | ||
| − | | | + | |<center>[[File:wmr200.png]]</center> |
| − | | | + | |'''Oregon''' WMR200 |
| − | | | + | |This model has a USB connector that can directly connected to the Meteoplug client. Internal Datalogger of WMR200 will not be used by Meteoplug. WMR200 has problems in reporting actual sensor readings, when data logger is completely filled. It is recommended to set the data logging interval to the maximum (longest duration). This takes care that the data logger will not reach its capacity for months. However, you should take care to empty the data logger's buffer from time to time manually at the WMR 200 base station. All sensors for WMR200 are supported, including additional thermo/hygro sensors as well as an UV sensor. |
| − | + | ||
|- | |- | ||
| − | | | + | |<center>[[File:wmr100.png]]</center> |
| − | | | + | |'''Oregon''' WMR100 |
| − | | | + | |This model has a USB connector that can directly connected to the Meteoplug client. Meteoplug supports all available sensors for WMR100, including additional thermo/hygro sensors as well as an UV sensor |
| − | + | ||
|- | |- | ||
| − | | | + | |<center>[[File:wmrs200.png]]</center> |
| − | | | + | |'''Oregon''' WMRS200 |
| − | | | + | |This station is like a WMR100 with sensors from WMR200 but without any display. WMRS200 is powered from Meteoplug via USB connector. All sensors applicable to WMRS200 are supported by Meteoplug. |
| − | + | ||
|- | |- | ||
| − | | | + | |<center>[[File:rms300.png]]</center> |
| − | | | + | |'''Oregon''' RMS300 |
| − | | | + | |This station gets directly connected by an USB cable and is just capable to report data from a maximum of 3 temp/hygro sensors. Out-door sensor is included in the package (THGN-132N) and mapped to channel 0 by Meteoplug. Sensors for wind, rain, UV, pressure are not supported. Additional temp/hygro sensors have to be of type THGR810. temp/hygro sensor included in the console is reported on channel 9. |
| − | + | ||
|- | |- | ||
| − | | | + | |<center>[[File:te923.png]]</center> |
| − | | | + | |'''Hideki''' TE923 |
| − | | | + | |TE923 weather station from Hideki is connected via USB and is sold with various brand names (Mebus, Irox, Honeywell, Nexus). TE923 had various hardware revisions over time. Meteoplug supports hardware versions 3, and 4. Very old version 1, that does not provide live weather data on the USB port, and version 2 are not supported. |
| − | |< | + | Meteoplug just makes use of the live data of TE923, internal data logger functionality of TE923 is not used by Meteoplug. |
| + | |- | ||
| + | |<center>[[File:wh1080.png]]</center> | ||
| + | |'''Fine Offset Electronics''' WH1080, WH1081 | ||
| + | |WH1080 weather station from Fine Offset Electronics is also branded as Watson W-8681, WX-2008, National Geographic 265 NE, Elecsa 6975/ 6976, Ambient Weather WS-1080/WS-2080. Meteoplug just makes use of live data of the WH-1080, internal data logger functionality of the WH1080 is not used by Meteoplug. Weather forecast icon is not supported as well. | ||
| + | |- | ||
| + | |<center>[[File:ultimeter.png]]</center> | ||
| + | |'''Peet Bros''' Ultimeter 100, 800, 2100 | ||
| + | | Ultimeter weather stations from Peet Bros are supported. Wind, rain, pressure, indoor and outdoor temperature and humidity are used. Supported Peet Bros data protocols are "data logging", "packet", "complete record". | ||
| + | |- | ||
| + | |<center>[[File:mk3.png]]</center> | ||
| + | |'''RainWise''' MkIII | ||
| + | |MkIII weather station from RainWise is supported including wind, rain, pressure, outdoor temperature and humidity. Meteoplug uses classical CRC communication type. Sensor thb0 reports pressure and outdoor temp/hum. Sensor th0 also reports outdoor temp/hum. | ||
| + | |- | ||
| + | |<center>[[File:ws2300.png]]</center> | ||
| + | |'''La Crosse''' WS2300 | ||
| + | |WS2300 weather station is supported. Data is received by a plug-in available under GPL. Source code can be at download from download section of "meteohub.de". | ||
| + | |- | ||
| + | |<center>[[File:ws300.png]]</center> | ||
| + | |'''ELV''' WS300PC/444/500 and various clones (WS550/777/888) | ||
| + | |WS300 weather station and clones are supported and connected via USB. | ||
|} | |} | ||
| + | === Supported Data Acquisition Devices === | ||
| + | {| style="background:none" border="1" cellpadding="5" cellspacing="0" | ||
| + | |+ align="bottom"|''supported data ackquisition devices'' | ||
| + | !colspan="2"|Device | ||
| + | ! Description | ||
| + | |- | ||
| + | |<center>[[File:rfxcom.png]]</center> | ||
| + | | '''RFXCOM''' 433MHz-Receiver for Oregon Scientific sensors (USB/LAN/WLAN) | ||
| + | | RFXCOM Receiver in 433MHz band can read all kinds of Oregon Scientific sensors and RFXmeter sensors, which can do monitoring of energy consumption. Receivers are available with USB connection (80002), LAN connection (81003), WLAN (82003) | ||
| + | |- | ||
| + | |<center>[[File:rfxtrx.png]]</center> | ||
| + | | '''RFXtrx433 USB''' 433MHz-Transceiver for a broad range of sensors | ||
| + | | RFXtrx433 USB is the follow-on product of older RFXCOM above and can handle a lot of RF sensors in 433MHz band. Supported sensors are the ones from Oregon Scientific, TFE and other companies. RFXtrx connects via USB to Meteoplug client. | ||
| + | |- | ||
| + | |<center>[[File:em1010PC.png]]</center> | ||
| + | | '''ELV, Conrad''' Energy monitors EM1010PC and EM1000 | ||
| + | | Meteoplug can read data from these USB connected energy monitoring devices. Information provided is actual power demand and total energy consumption. | ||
| + | |- | ||
| + | |<center>[[File:envi.png]]</center> | ||
| + | | '''Current Cost''' Energy monitor Envi CC128 | ||
| + | | Meteoplug can read data from this USB connected energy monitoring device. Information provided is indoor temperature and actual power demand. | ||
| + | |- | ||
| + | |} | ||
| − | == | + | === '''Not''' Supported Weather Stations === |
| − | + | These weather stations are not supported: | |
| − | * | + | * WS2800 and WS3600 from La Crosse and/or ELV are not supported. |
| − | + | * Labjack U3 which is supported by Meteohub is not supported by Meteoplug. | |
| − | + | * 1wire weather stations are not supported. | |
| − | + | ||
| − | + | ||
| − | * | + | |
| − | + | ||
| − | + | ||
| − | * | + | |
| − | + | ||
| − | + | ||
| − | + | ||
| − | + | ||
| − | + | ||
| − | + | ||
| − | == | + | == Meteoplug Client Hardware == |
| − | + | ||
| − | + | ||
| − | + | ||
| − | + | ||
| − | + | ||
| − | + | ||
| − | + | ||
| − | + | ||
| − | + | ||
| − | + | ||
| − | + | ||
| − | + | ||
| − | + | ||
| − | + | ||
| − | + | ||
| − | + | ||
| − | + | ||
| − | == | + | === Meteohub === |
| − | + | Any Meteohub system can also feed the Meteoplug server with data. This allows to make use of Meteoplug's data storage capabilities as some kind of a raw data backup and this will also allow you the to make use of Meteoplug graphing features that are somehow more powerful than gnuplot based graphing on a Meteohub. | |
| − | + | ||
| − | + | ||
| − | + | ||
| − | + | ||
| − | + | ||
| − | + | ||
| − | + | ||
| − | + | ||
| − | + | ||
| − | + | ||
| − | + | ||
| − | + | ||
| − | + | ||
| − | + | ||
| − | + | Definition of weather stations and sensors has to be done on the Meteohub. Meteoplug just mirrors settings you have done on your Meteohub. When you change settings on your Meteohub it might take some time until these changes are effective on Meteoplug. | |
| − | + | ||
| − | + | ||
| − | + | ||
| − | + | ||
| − | + | ||
| − | + | ||
| − | + | ||
| − | + | ||
| − | + | ||
| − | + | ||
| − | + | ||
| − | + | ||
| − | + | ||
| − | + | ||
| − | + | ||
| − | + | ||
| − | + | ||
| − | + | You will find more information about Meteohub at [http://www.meteohub.de meteohub.de]. | |
| − | [ | + | |
| − | + | ||
| − | + | ||
| − | + | ||
| − | + | ||
| − | + | ||
| − | + | ||
| − | + | ||
| − | + | ||
| − | + | ||
| − | + | ||
| − | + | ||
| − | + | ||
| − | + | ||
| − | + | ||
| − | + | ||
| − | + | ||
| + | ===TP-Link TL-MR3020=== | ||
| + | [[File:tl-mr3020-w250.png|left]] Tiny router TL-3020 from TP-Link is currently most recommended Meteoplug client hardware. TL-MR3020 is word-wide available for less than $50. Flashing the unit with Meteoplug firmware makes the router a Meteoplug client, providing the feature to send data from a weather station via wired or wireless LAN to Meteoplug cloud services in the Internet. Currently sold TL-MR3020 are version 1.7. Meteoplug client was tested with version 1.7 models. If previous versions do also work with Meteoplug client image has not been tested yet. What makes the TL-MR shine beside its features is extremely low power consumption. According to [https://apollo.open-resource.org/lab:argus this site] it takes below 1 Watt without USB and only slightly more with WLAN and USB operating. | ||
| + | TL-MR3020 has a limitation concerning USB devices. It can just handle USB 2.0 devices, low speed USB 1.x devices will not be handled correctly. This is very easy to overcome by adding a small cheap, unpowered external USB 2.0 HUB, which translates USB 1.x from your weather station to USB 2.0. Weather stations known to be impacted by this are: | ||
| + | * Vantage and Vue when used with original Davis USB datalogger | ||
| + | * Fine Offset Electronics WH-1080 and alike stations | ||
| + | * Oregon WMR 88/100/200 stations | ||
| + | * Hideki TE923 and alike stations | ||
| − | + | The core of the image to be flashed into the router is an openwrt Linux distribution with some specific Meteoplug software components on top. Connectivity to the Internet via LAN or WLAN is handled by the openwrt functions, while doing readout of data from a weather station and holding connection with Meteoplug cloud on an application level is done the software components provided by smartbedded.com. Most part of the application software is not inside the flashed image but gets downloaded during client startup from Meteoplug cloud service. This has the great advantage that most software updates can be realized without reflashng the client hardware again. Each time a Meteoplug client boots, it downloads the most recent software version and starts running it. | |
| − | + | ||
| − | + | ||
| − | + | ||
| − | + | ||
| − | + | ||
| − | + | ||
| − | + | ||
| − | + | ||
| − | + | ||
| − | + | ||
| − | + | ||
| − | + | ||
| − | + | ||
| − | + | ||
| − | + | ||
| − | + | ||
| − | + | ||
| − | + | ||
| − | + | ||
| − | </ | + | Meteoplug client operation needs a LAN or WLAN connection to the Internet. To achieve this Meteoplug client on TL-MR3020 can be started in two different modes of operation regarding network usage. Apart from that it is also possible to configure the network features in any way that is supported by openwrt. So beside the easy mainstreet approached outlined here, there are tons of options to get a Meteoplug client operational in nearly every network environment you might think of. |
| + | |||
| + | =====LAN-Mode (default): Meteoplug is a DHCP client in your LAN===== | ||
| + | As default Meteoplug client starts in LAN mode, where it gets IP, Gateway and DNS information from the DHCP server (mostly the router) in your LAN network. If these conditions are met, seeting up Meteoplug client is dead simple. Just connect it to your LAN with an ethernet cable, power it on and a few minutes later it will have connected to Meteoplug cloud and can be used there. In order to make this contact happed, Internet needs to be available for the IP given to the Meteoplug client. Especially, port 80 must not be blocked for outgoing traffic from the IP Meteoplug client uses. Any proxies in-between will also block communication and need to be disabled. | ||
| + | |||
| + | =====Reset Password Mode: Meteoplug password is reset to default===== | ||
| + | When you login to Meteoplug's underlying openwrt to adjust network settings, you need to authenticate by a password. This mode resets password back to "meteoplug" regardless what it has been set to before. | ||
| + | |||
| + | ====Toggling Modes==== | ||
| + | When having installed Meteoplug client firmware on TL-MR3020 for the first time, Meteoplug is in "LAN mode" as described above. However, you can switch to any of the other explained modes by pressing the button and not releasing it until the LED blinks. You toggle between modes by waiting until the LED has done a distinct number of blinks, before you release the button. After release of the button Meteoplug client will reboot and start in selected mode: | ||
| + | * Release button after first blink: LAN mode (factory default) | ||
| + | * Release button after second blink: reset password to "meteoplug", no change in network settings | ||
| + | |||
| + | ====Findout IP==== | ||
| + | In order to connect with your web bowser to a Meteoplug to change settings or check status, you need to know its IP. By pressing (and releasing it again quickly) of the transparent illuminated button on the top of the Meteoplug cover (TL-MR3020) or the reset button at the back (TL-WR703N), Meteoplug will signal its IP by pulsing the lead beneath the pressed button. Sequence begins with LED going off, then each of the four numbers (delimited by a dot) will be signaled one by one. The dot between the numbers will be signaled by a "H" (LED shines bright). Each number is signaled by blinking digit per digit. Each digit is represented by a "M" (LED shines medium dimmed) repeated as often as the digit tells us. The zero digit is signaled by ten blinks. After having done this for all digits of all numbers of the IP, the end is signaled by LED staying off a while like it started with. When Sequenze is done, the LED is constantly turned on again. | ||
| + | |||
| + | Example: IP 192.168.10.77 Legend: M = LED medium dimmed, H = LED shines bright, _ = LED is dark | ||
| + | |||
| + | <pre>Signal: Comment | ||
| + | ___M___M_M_M_M_M_M_M_M_M___M_M___H 192 | ||
| + | ___M___M_M_M_M_M_M___M_M_M_M_M_M_M_M___H 168 | ||
| + | ___M___M_M_M_M_M_M_M_M_M_M___H 10 | ||
| + | ___M_M_M_M_M_M_M___M_M_M_M_M_M_M___ 77</pre> | ||
| + | |||
| + | When Meteohub does not have a valid IP this will be signaled with three blinks shortly following each other. | ||
| + | |||
| + | In addition to optical signaling the MAC, LAN IP and WLAN IP is stored in a file "network.log" when a FAT formatted USB stick is insterted into the USB port. Example:<pre>Sat Jan 5 00:23:16 UTC 2013 | ||
| + | MAC: 90:F6:52:C5:2A:B7 | ||
| + | LAN IP: 192.168.123.245 | ||
| + | </pre> | ||
| + | |||
| + | ====Open Source Obligations==== | ||
| + | Meteoplug client image is an openwrt with some application extensions. openwrt Linux distribution including cross compilation toolchain can be dowloaded as described [https://forum.openwrt.org/viewtopic.php?id=33429&p=10 here]. Adaptions on top of openwrt are done inside directory "files", located inside "trunk" directory. an archive of Meteoplug specific "files" directory plus "config" files for TL-MR3020 und TL-WR703N which holds kernel configuration can be downloaded from [http://www.meteohub.de/files/meteoplug-openwrt-addon.tgz here]. Meteoplug components being intellectual property of smartbedded.com and not licensed as Open Source are not part of the archive. TL-MR3020 and TL-WR703N operating Meteoplug can be fully inspected by ssh login as user "root" with password "meteoplug". | ||
| + | |||
| + | ===TP-Link WR703N (produced for China market only)=== | ||
| + | [[File:tl-wr307n-w180.png|left]] This is TP-Links little brother of the TL-3020. These units come with a really appealing minimal form factor and beside the missing 3-step switch and the missing additional LEDs for USB, WLAN and LAN it has the same features as the TL-MR3020 but comes at prices down to $25. TP-Link does not sell the units in US and Europe, but you will find lots of them on ebay. Currently sold TL-WR703N are version 1.6. Meteoplug client was tested with version 1.6 models. If previous versions do also work with Meteoplug client image has not been tested yet. Please make sure that you don't get a WR-702 (which is widely sold in Europe and US), because that model is not capable of running openwrt and Meteoplug. What makes the TL-WR703N shine beside its features is an extremely low power consumption, even slightly below TL-MR3020 values. | ||
| + | |||
| + | TL-WR703 has a limitation concerning USB devices (like TL-MR3020). It can just handle USB 2.0 devices, low speed USB 1.x devices will not be handled correctly. This is very easy to overcome by adding a small cheap, unpowered external USB 2.0 HUB, which translates USB 1.x from your weather station to USB 2.0. Weather stations known to be impacted by this are: | ||
| + | * Davis Vantage and Vue when used with original Davis USB datalogger | ||
| + | * Hideki stations | ||
| + | * Oregon WMR 88/100/200 stations | ||
| + | * TE923 and alike stations | ||
| + | |||
| + | Meteoplug client operation needs a LAN or WLAN connection to the Internet. To achieve this, Meteoplug client on TL-WR703N can be started in different modes of operation regarding network usage, exactly as described for TL-MR3020. Toggling modes and finding out IP work as described for TL-MR3020, the only difference is that the button is behind the pin hole at the back. | ||
| + | |||
| + | ====Open Source Obligations==== | ||
| + | Please see section on this for TL-MR3020, Open Source aspects are covered there for both types of devices. | ||
| + | |||
| + | ===ASUS WL-330N3G=== | ||
| + | [[File:wl-330N3g-w180.png|left]] This tiny router from ASUS has all the features of the ones from TP-link discussed above but can handle all kind of USB 1.x and 2.0 devices without need for a USB hub. WL-330N3G is widely available in Europe for prices down to 40 Euro (and sometimes below) but a bit harded to get for a fair prce in the US. It is important not to buy the similar looking predecessor named "WL-330N" as this does not have the needed RAM capacity. Form factor of WL-330N3G is really appealing and considerably smaller then TL-MR3020. As WL-330N3G has a different processor in MIPSEL architecture (while the TP-Link routers above use MIPS) is needs distinct compiled executables. Nothing you need to worry about, as the provided Meteoplug images take care of these differences. | ||
| + | |||
| + | Meteoplug client operation needs a LAN or WLAN connection to the Internet. To achieve this, Meteoplug client on WL-330N3G can be started in different modes of operation regarding network usage, exactly as described for TP-Link routers described above. Toggling modes and finding out IP work does work identical to TP-Link routers. | ||
| + | |||
| + | ====Open Source Obligations==== | ||
| + | Please see section on this for TL-MR3020, Open Source aspects are covered there for devices from TP-Link and ASUS in the same way. | ||
| + | |||
| + | === Bifferboard (no longer available)=== | ||
| + | [[File:bb.png|left]] Bifferboard was the first true Meteoplug client hardware. Bifferboards are extremely small, low cost and take just 1 watt of power. If you are interested in that technology you might start reading here: [http://www.bifferos.com/] | ||
| + | |||
| + | When used with Meteoplug Bifferboard's internal flash storage has to be flashed with a Meteoplug client image. This Meteoplug client image takes care that Bifferboard connects to Meteoplug server during boot and loads the most recent Client applications into the Bifferboard. That means, you don't have to update your Bifferboard client software to get advantage of new features, but Bifferboard will just need a reboot to get the most recent Meteoplug client application. | ||
| + | |||
| + | Unfortunately, the inventors have stopped selling Bifferboards. Details are lined out [http://www.bifferos.co.uk/buy/ here]. If you are going for large quantaties direct order from the manufacturer might be an option, as explained on the web page the above link points to. | ||
| + | |||
| + | As Meteoplug client needs Meteoplug server to start up correctly it is vital that your Meteoplug client is embedded into a LAN where it gets an IP and necessary gateway and DNS information from your router via DHCP. When you don't have a router that keeps internet contact 24/7 or you don't have a DHCP server (mostly your router) in your LAN, then Meteoplug client will not work. In addition to that Meteoplug client relies on the capability to connect to the Meteolug server in the internet. Normally you don't have to make a setup for this in your firewall, as this is just outgoing http traffic on standard port 80. You just have to make sure that your router is not blocking http internet access on port 80 for the Meteoplug client. In 95% of domestic setups, Meteoplug client will work without any hassle, just plug in Meteoplug client into your LAN and login on the Meteoplug server with your browser to start setting up your account and receiving weather data. | ||
| + | |||
| + | [[File:bb-x.png|bottom]] [[File:nslu2-x.png|bottom]] [[File:bb-hand.png|bottom]] [[File:bb-inside-1.png]] [[File:bb-inside-2.png]] | ||
| + | |||
| + | As you can see, Bifferboard is really tiny, even when compared to the small NSLU2 or when holding it in your hand. Bifferboard has one USB and one LAN connector. When using a USB hub, more than one weather station can be connected. Power is attached by a small external power adapter that can handle 110-240 volts. Bifferboard has a tiny hole in the cover to allow for reset with a paperclip. A blue LED indicates power on and a yellow one blinks on LAN traffic. The unit gets hand warm during operation and is completely noiseless. Bifferboards come with 1, 4or 8 MB (latest model) of internal flash storage and 32 MB of RAM. All variants are working well with Meteoplug. Meteoplug client is loaded into RAM disk which eliminates risk of wearing out flash cells. As there are no write operations on flash storage there is no risk of flash storage going bad over time. Bifferboard automatically reboots after power failure. It has a watchdog running that reboots when system appears to be stalled. All in all Bifferboard brings all the features needed to provide a reliable data logging client. | ||
| + | |||
| + | ===Bifferboard Twin-USB (reduced availability)=== | ||
| + | There is a variant of Bifferboard that has two USB ports and a SD card slot. Meteoplug does not make use of SD card slot (using this will disable on of the USB ports), but can drive both USB ports. This is very usefull, if you plan to connect two weather stations to Meteoplug client. Apart from twin USB feature this Bifferboard is identical to single USB Bifferboard. | ||
| + | This product also seems to be close to EOL, but it is still available in the UK [http://www.omnima.co.uk/store/product.php?productid=16194 here] (flashing of Meteoplug client SW has to be done by the user himself). | ||
| + | |||
| + | [[File:bb2-outside.png|bottom]] [[File:bb2-lan.png|bottom]] [[File:bb2-usb.png|bottom]] [[File:bb2-hand.png|bottom]] [[File:bb2-inside-1.png]] [[File:bb2-inside-2.png]] | ||
| + | |||
| + | Twin-USB Bifferboard provides a red LED that Meteoplug client software makes use of to signal client's LAN IP. This red LED is also on PCB of standard Bifferboards, but its case does no provide a hole to have a look at it. When you look straight into the not connected USB port of a standard Bifferboard you can see the red light of this LED a bit (will not work in bright sun light). Numbers are signaled by blinking red LED. Each of the four blocks of numbers is signaled with a slightly dimmed red blinking. Each digit inside a number block is represented by a corresponding number of blinks ("0" is ten blinks), Separation of digits is done by a short additional pause. Dot between number blocks is represented by a full-powered, undimmed red blink. When signaling of IP is done, red LED stays powered-on. This indicates, that Meteoplug client has booted correctly and is operational. | ||
| + | |||
| + | === Regular Linux System (discontinued, no longer supported) === | ||
| + | You can also use your X86 Linux system to act as a Meteoplug client. Just download a small package and follow instruction in the README. | ||
| + | |||
| + | === Fritz!Box 7270/7240 (discontinued, no longer supported)=== | ||
| + | {| style="background:none" border="0" cellpadding="5" cellspacing="0" | ||
| + | |- | ||
| + | |<center>[[File:fb7270.png]]</center> | ||
| + | |As Fritz!Box 7270/7240 has a USB port, pretty much RAM (64MB) and sufficient processing power (350 BogoMIPS) I made a port of the Meteoplug client to this platform. Meteoplug client package can be installed by Fritx!Box regular web interface like other software updates. When doing so a message appears, telling you that this is not a regular update from AVM, which is certainly true. When you continue installation, a Meteoplug client software package will be installed on your 7270/7240. Please wait a couple of minutes after reboot and then try to browse to your Fritz!Box's IP at port 7770. You should see a not populated Meteoplug client dashboard there. Having that you should register an account at Meteoplug. Details about all that is outlined in "Getting Started" section of this wiki. Installation of Meteoplug client on your 7270/7240 is done at your own risk. Please notice that there always is a possibility to "brick" your 7270/7240 when flashing non AVM packages onto it. Meteoplug package is just for 7270/7240, other Fritz!Boxes are not supported. | ||
| + | |} | ||
Latest revision as of 14:28, 9 February 2020
Contents
- 1 Weather Stations
- 2 Meteoplug Client Hardware
- 2.1 Meteohub
- 2.2 TP-Link TL-MR3020
- 2.3 TP-Link WR703N (produced for China market only)
- 2.4 ASUS WL-330N3G
- 2.5 Bifferboard (no longer available)
- 2.6 Bifferboard Twin-USB (reduced availability)
- 2.7 Regular Linux System (discontinued, no longer supported)
- 2.8 Fritz!Box 7270/7240 (discontinued, no longer supported)
Weather Stations
Meteoplug supports exactly the same weather stations as Meteohub. As current Meteoplug clients just have USB, weather stations with USB connector (serial and HID type) or TCP/IP connection (connected via a hub, switch or router to Meteoplug client) are directly supported. To have a RS232 connected weather station supported a Meteoplug compatible RS232-to-USB converter is needed. Attached you find a list of supported weather stations.
Internal data logger of weather stations is in general not supported. Exception is Davis Vantage/Vue. Here Meteoplug checks for data in the internal logger of the weather station before doing reading regular live data.
Supported Weather Stations
Supported Data Acquisition Devices
Not Supported Weather Stations
These weather stations are not supported:
- WS2800 and WS3600 from La Crosse and/or ELV are not supported.
- Labjack U3 which is supported by Meteohub is not supported by Meteoplug.
- 1wire weather stations are not supported.
Meteoplug Client Hardware
Meteohub
Any Meteohub system can also feed the Meteoplug server with data. This allows to make use of Meteoplug's data storage capabilities as some kind of a raw data backup and this will also allow you the to make use of Meteoplug graphing features that are somehow more powerful than gnuplot based graphing on a Meteohub.
Definition of weather stations and sensors has to be done on the Meteohub. Meteoplug just mirrors settings you have done on your Meteohub. When you change settings on your Meteohub it might take some time until these changes are effective on Meteoplug.
You will find more information about Meteohub at meteohub.de.
TP-Link TL-MR3020
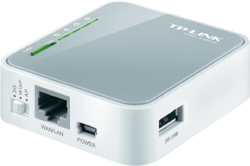
Tiny router TL-3020 from TP-Link is currently most recommended Meteoplug client hardware. TL-MR3020 is word-wide available for less than $50. Flashing the unit with Meteoplug firmware makes the router a Meteoplug client, providing the feature to send data from a weather station via wired or wireless LAN to Meteoplug cloud services in the Internet. Currently sold TL-MR3020 are version 1.7. Meteoplug client was tested with version 1.7 models. If previous versions do also work with Meteoplug client image has not been tested yet. What makes the TL-MR shine beside its features is extremely low power consumption. According to this site it takes below 1 Watt without USB and only slightly more with WLAN and USB operating.TL-MR3020 has a limitation concerning USB devices. It can just handle USB 2.0 devices, low speed USB 1.x devices will not be handled correctly. This is very easy to overcome by adding a small cheap, unpowered external USB 2.0 HUB, which translates USB 1.x from your weather station to USB 2.0. Weather stations known to be impacted by this are:
- Vantage and Vue when used with original Davis USB datalogger
- Fine Offset Electronics WH-1080 and alike stations
- Oregon WMR 88/100/200 stations
- Hideki TE923 and alike stations
The core of the image to be flashed into the router is an openwrt Linux distribution with some specific Meteoplug software components on top. Connectivity to the Internet via LAN or WLAN is handled by the openwrt functions, while doing readout of data from a weather station and holding connection with Meteoplug cloud on an application level is done the software components provided by smartbedded.com. Most part of the application software is not inside the flashed image but gets downloaded during client startup from Meteoplug cloud service. This has the great advantage that most software updates can be realized without reflashng the client hardware again. Each time a Meteoplug client boots, it downloads the most recent software version and starts running it.
Meteoplug client operation needs a LAN or WLAN connection to the Internet. To achieve this Meteoplug client on TL-MR3020 can be started in two different modes of operation regarding network usage. Apart from that it is also possible to configure the network features in any way that is supported by openwrt. So beside the easy mainstreet approached outlined here, there are tons of options to get a Meteoplug client operational in nearly every network environment you might think of.
LAN-Mode (default): Meteoplug is a DHCP client in your LAN
As default Meteoplug client starts in LAN mode, where it gets IP, Gateway and DNS information from the DHCP server (mostly the router) in your LAN network. If these conditions are met, seeting up Meteoplug client is dead simple. Just connect it to your LAN with an ethernet cable, power it on and a few minutes later it will have connected to Meteoplug cloud and can be used there. In order to make this contact happed, Internet needs to be available for the IP given to the Meteoplug client. Especially, port 80 must not be blocked for outgoing traffic from the IP Meteoplug client uses. Any proxies in-between will also block communication and need to be disabled.
Reset Password Mode: Meteoplug password is reset to default
When you login to Meteoplug's underlying openwrt to adjust network settings, you need to authenticate by a password. This mode resets password back to "meteoplug" regardless what it has been set to before.
Toggling Modes
When having installed Meteoplug client firmware on TL-MR3020 for the first time, Meteoplug is in "LAN mode" as described above. However, you can switch to any of the other explained modes by pressing the button and not releasing it until the LED blinks. You toggle between modes by waiting until the LED has done a distinct number of blinks, before you release the button. After release of the button Meteoplug client will reboot and start in selected mode:
- Release button after first blink: LAN mode (factory default)
- Release button after second blink: reset password to "meteoplug", no change in network settings
Findout IP
In order to connect with your web bowser to a Meteoplug to change settings or check status, you need to know its IP. By pressing (and releasing it again quickly) of the transparent illuminated button on the top of the Meteoplug cover (TL-MR3020) or the reset button at the back (TL-WR703N), Meteoplug will signal its IP by pulsing the lead beneath the pressed button. Sequence begins with LED going off, then each of the four numbers (delimited by a dot) will be signaled one by one. The dot between the numbers will be signaled by a "H" (LED shines bright). Each number is signaled by blinking digit per digit. Each digit is represented by a "M" (LED shines medium dimmed) repeated as often as the digit tells us. The zero digit is signaled by ten blinks. After having done this for all digits of all numbers of the IP, the end is signaled by LED staying off a while like it started with. When Sequenze is done, the LED is constantly turned on again.
Example: IP 192.168.10.77 Legend: M = LED medium dimmed, H = LED shines bright, _ = LED is dark
Signal:                                          Comment
___M___M_M_M_M_M_M_M_M_M___M_M___H               192
___M___M_M_M_M_M_M___M_M_M_M_M_M_M_M___H         168
___M___M_M_M_M_M_M_M_M_M_M___H                   10
___M_M_M_M_M_M_M___M_M_M_M_M_M_M___              77
When Meteohub does not have a valid IP this will be signaled with three blinks shortly following each other.
In addition to optical signaling the MAC, LAN IP and WLAN IP is stored in a file "network.log" when a FAT formatted USB stick is insterted into the USB port. Example:Sat Jan 5 00:23:16 UTC 2013 MAC: 90:F6:52:C5:2A:B7 LAN IP: 192.168.123.245
Open Source Obligations
Meteoplug client image is an openwrt with some application extensions. openwrt Linux distribution including cross compilation toolchain can be dowloaded as described here. Adaptions on top of openwrt are done inside directory "files", located inside "trunk" directory. an archive of Meteoplug specific "files" directory plus "config" files for TL-MR3020 und TL-WR703N which holds kernel configuration can be downloaded from here. Meteoplug components being intellectual property of smartbedded.com and not licensed as Open Source are not part of the archive. TL-MR3020 and TL-WR703N operating Meteoplug can be fully inspected by ssh login as user "root" with password "meteoplug".
TP-Link WR703N (produced for China market only)
This is TP-Links little brother of the TL-3020. These units come with a really appealing minimal form factor and beside the missing 3-step switch and the missing additional LEDs for USB, WLAN and LAN it has the same features as the TL-MR3020 but comes at prices down to $25. TP-Link does not sell the units in US and Europe, but you will find lots of them on ebay. Currently sold TL-WR703N are version 1.6. Meteoplug client was tested with version 1.6 models. If previous versions do also work with Meteoplug client image has not been tested yet. Please make sure that you don't get a WR-702 (which is widely sold in Europe and US), because that model is not capable of running openwrt and Meteoplug. What makes the TL-WR703N shine beside its features is an extremely low power consumption, even slightly below TL-MR3020 values.TL-WR703 has a limitation concerning USB devices (like TL-MR3020). It can just handle USB 2.0 devices, low speed USB 1.x devices will not be handled correctly. This is very easy to overcome by adding a small cheap, unpowered external USB 2.0 HUB, which translates USB 1.x from your weather station to USB 2.0. Weather stations known to be impacted by this are:
- Davis Vantage and Vue when used with original Davis USB datalogger
- Hideki stations
- Oregon WMR 88/100/200 stations
- TE923 and alike stations
Meteoplug client operation needs a LAN or WLAN connection to the Internet. To achieve this, Meteoplug client on TL-WR703N can be started in different modes of operation regarding network usage, exactly as described for TL-MR3020. Toggling modes and finding out IP work as described for TL-MR3020, the only difference is that the button is behind the pin hole at the back.
Open Source Obligations
Please see section on this for TL-MR3020, Open Source aspects are covered there for both types of devices.
ASUS WL-330N3G
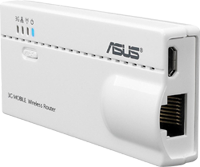
This tiny router from ASUS has all the features of the ones from TP-link discussed above but can handle all kind of USB 1.x and 2.0 devices without need for a USB hub. WL-330N3G is widely available in Europe for prices down to 40 Euro (and sometimes below) but a bit harded to get for a fair prce in the US. It is important not to buy the similar looking predecessor named "WL-330N" as this does not have the needed RAM capacity. Form factor of WL-330N3G is really appealing and considerably smaller then TL-MR3020. As WL-330N3G has a different processor in MIPSEL architecture (while the TP-Link routers above use MIPS) is needs distinct compiled executables. Nothing you need to worry about, as the provided Meteoplug images take care of these differences.Meteoplug client operation needs a LAN or WLAN connection to the Internet. To achieve this, Meteoplug client on WL-330N3G can be started in different modes of operation regarding network usage, exactly as described for TP-Link routers described above. Toggling modes and finding out IP work does work identical to TP-Link routers.
Open Source Obligations
Please see section on this for TL-MR3020, Open Source aspects are covered there for devices from TP-Link and ASUS in the same way.
Bifferboard (no longer available)
Bifferboard was the first true Meteoplug client hardware. Bifferboards are extremely small, low cost and take just 1 watt of power. If you are interested in that technology you might start reading here: [1]When used with Meteoplug Bifferboard's internal flash storage has to be flashed with a Meteoplug client image. This Meteoplug client image takes care that Bifferboard connects to Meteoplug server during boot and loads the most recent Client applications into the Bifferboard. That means, you don't have to update your Bifferboard client software to get advantage of new features, but Bifferboard will just need a reboot to get the most recent Meteoplug client application.
Unfortunately, the inventors have stopped selling Bifferboards. Details are lined out here. If you are going for large quantaties direct order from the manufacturer might be an option, as explained on the web page the above link points to.
As Meteoplug client needs Meteoplug server to start up correctly it is vital that your Meteoplug client is embedded into a LAN where it gets an IP and necessary gateway and DNS information from your router via DHCP. When you don't have a router that keeps internet contact 24/7 or you don't have a DHCP server (mostly your router) in your LAN, then Meteoplug client will not work. In addition to that Meteoplug client relies on the capability to connect to the Meteolug server in the internet. Normally you don't have to make a setup for this in your firewall, as this is just outgoing http traffic on standard port 80. You just have to make sure that your router is not blocking http internet access on port 80 for the Meteoplug client. In 95% of domestic setups, Meteoplug client will work without any hassle, just plug in Meteoplug client into your LAN and login on the Meteoplug server with your browser to start setting up your account and receiving weather data.
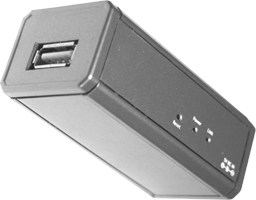
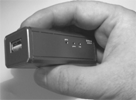
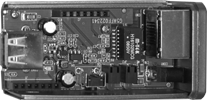
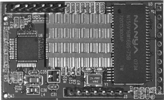
As you can see, Bifferboard is really tiny, even when compared to the small NSLU2 or when holding it in your hand. Bifferboard has one USB and one LAN connector. When using a USB hub, more than one weather station can be connected. Power is attached by a small external power adapter that can handle 110-240 volts. Bifferboard has a tiny hole in the cover to allow for reset with a paperclip. A blue LED indicates power on and a yellow one blinks on LAN traffic. The unit gets hand warm during operation and is completely noiseless. Bifferboards come with 1, 4or 8 MB (latest model) of internal flash storage and 32 MB of RAM. All variants are working well with Meteoplug. Meteoplug client is loaded into RAM disk which eliminates risk of wearing out flash cells. As there are no write operations on flash storage there is no risk of flash storage going bad over time. Bifferboard automatically reboots after power failure. It has a watchdog running that reboots when system appears to be stalled. All in all Bifferboard brings all the features needed to provide a reliable data logging client.
Bifferboard Twin-USB (reduced availability)
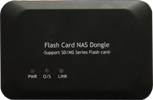
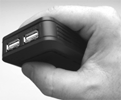
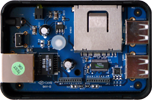
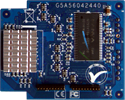
There is a variant of Bifferboard that has two USB ports and a SD card slot. Meteoplug does not make use of SD card slot (using this will disable on of the USB ports), but can drive both USB ports. This is very usefull, if you plan to connect two weather stations to Meteoplug client. Apart from twin USB feature this Bifferboard is identical to single USB Bifferboard. This product also seems to be close to EOL, but it is still available in the UK here (flashing of Meteoplug client SW has to be done by the user himself).
Twin-USB Bifferboard provides a red LED that Meteoplug client software makes use of to signal client's LAN IP. This red LED is also on PCB of standard Bifferboards, but its case does no provide a hole to have a look at it. When you look straight into the not connected USB port of a standard Bifferboard you can see the red light of this LED a bit (will not work in bright sun light). Numbers are signaled by blinking red LED. Each of the four blocks of numbers is signaled with a slightly dimmed red blinking. Each digit inside a number block is represented by a corresponding number of blinks ("0" is ten blinks), Separation of digits is done by a short additional pause. Dot between number blocks is represented by a full-powered, undimmed red blink. When signaling of IP is done, red LED stays powered-on. This indicates, that Meteoplug client has booted correctly and is operational.
Regular Linux System (discontinued, no longer supported)
You can also use your X86 Linux system to act as a Meteoplug client. Just download a small package and follow instruction in the README.


